Introduction
Have you ever played a game like Resident Evil or Escape from Tarkov and found yourself spending ungodly amounts of time to fit your items perfectly in the inventory grid? Well if so then today is your lucky day, because I will guide you through my experience implementing a Tetris style Inventory in Godot.
More Concretely, here is an overview of the things I will write about in this post, in case you want to skip ahead:
- Concept
- Built-in Drag & Drop system
- Rotating items
- Handling Drag Failure
- Storage System
- Final Thoughts
Concept
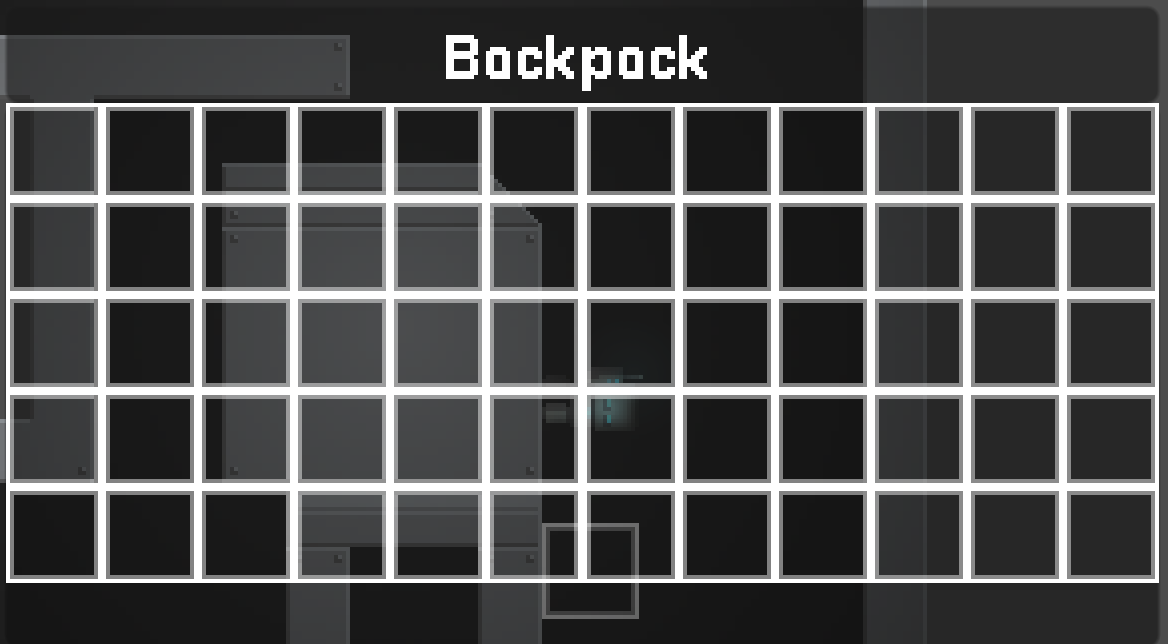
So you may wonder how the Basic concept of the inventory system works behind the scenes. The goal is to have a Grid where you can drag & drop items and also rotating items to fit neatly. How do we achieve this effect?
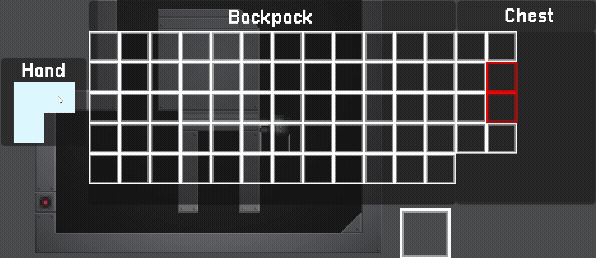
The whole inventory is based on a grid which is a rectangular 2-dimensional array of slots. I implemented it to have a dynamic size based on a specific size. That way you can dynamically add more or less slots as needed. Each slot has a boolean for its occupied status and a reference to the item resource it may hold. When trying to place an item, the system checks all slots that would be occupied by the dragged item are available for use. It also checks if the item would go out of bounds.
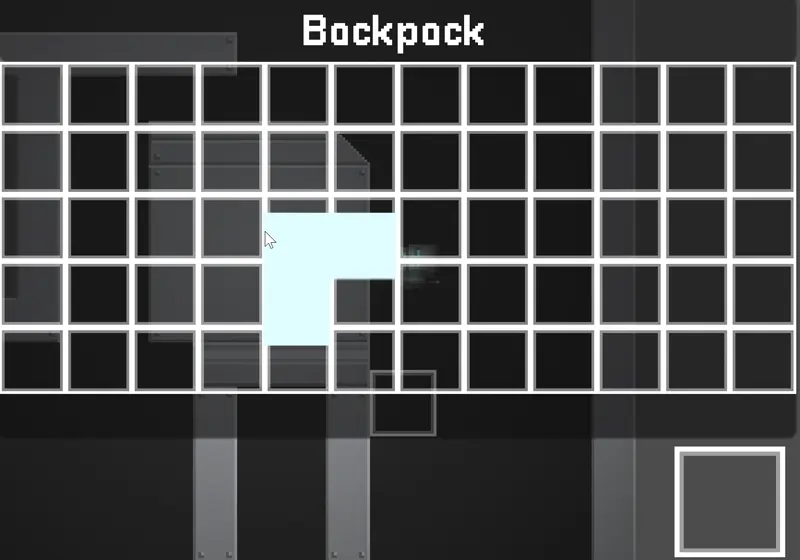
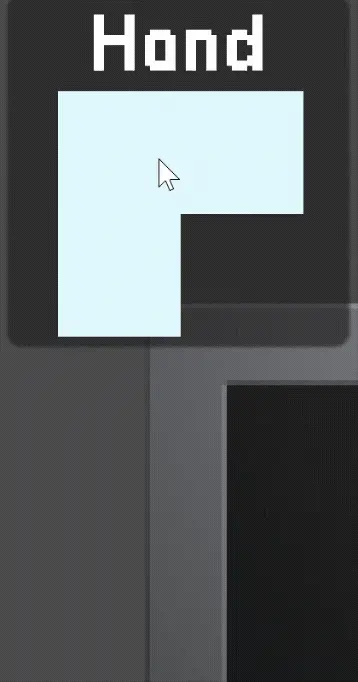
Items themselves have an occupancy matrix for the slots they occupy because they don’t always fill a perfect rectangle. I use a Godot 2d boolean array for this matrix. For example, an “L” shaped item’s matrix would look like this:
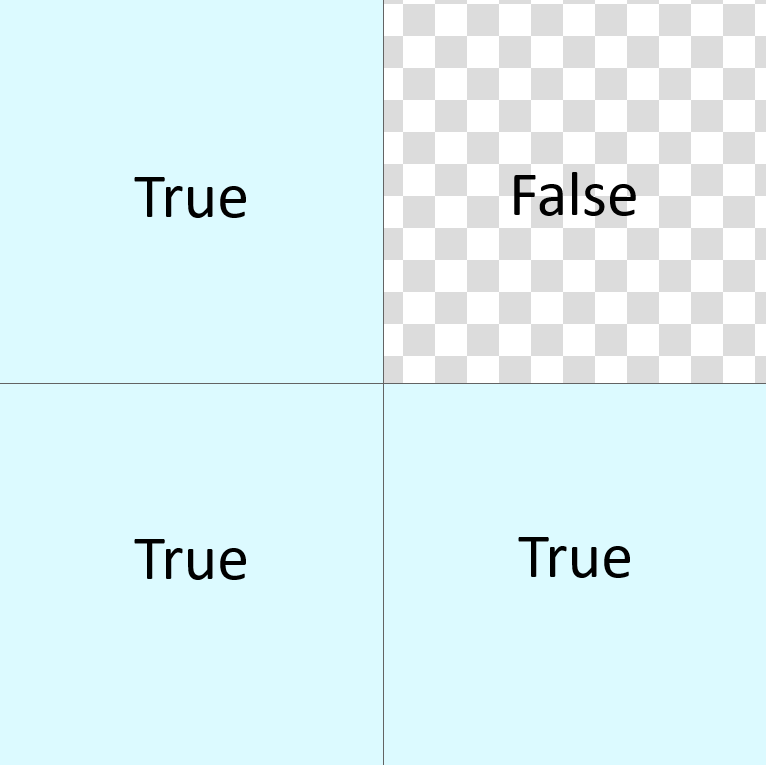
If the grid has space in those slots, the item can be placed.
Now you might ask, how does the built-in Godot Drag & Drop system actually work and what are its strengths and weaknesses?
Built-in Drag & Drop System
The Drag & Drop system is for Control nodes aka UI elements. The core of it are the following methods:
Drag Source (where the drag starts)
Variant _GetDragData(Vector2 atPosition) This method is called when the user clicks a control object and starts dragging. You can override this method and return any Godot Variant data you want. In our case we want to return the item being dragged from the slot where the drag begins and remove it from the current slots it’s in. Here we also set the drag preview with
SetDragPreview(TextureRect itemPreview)to the actual scale of our item in the inventory.
Drop Target (where the drag ends)
bool _CanDropData(Vector2 atPosition, Variant data) This method checks if the drop zone you are hovering over is a valid target. By default you can drop any dragged data to any control node that has a
_DropDatamethod, but you can override_CanDropData()to define your own condition. Here we want to check if the item has enough space to be dropped at this spot.void _DropData(Vector2 atPosition, Variant data) This method defines a control node as a drop zone, if the conditions for
_CanDropData()are met. Here we want to place our item in the grid by assigning it to all slots that would be occupied by it and creating a TextureRect with the item image in the slot it’s been dropped to.
Notifications
The Notifications are useful for knowing when a certain event happens. When a drag ends, there is a global notification NotificationDragEnd and you can us the boolean GetViewport().GuiIsDragSuccessful() to check if the dragged data was dropped correctly. Because it’s global, there is no easy way to know where the Drag started. This is especially problematic for resetting the item to its original slot, as we will see later in this post.
Advantages
- easily prototype and transfer data from one drop zone to the other (in this case the dragged item from slot to slot)
- drag preview image is easy to use (No manual mouse tracking needed)
Disadvantages
- no easy way to check if the drag event was succesful for a particular node (signal goes out to all nodes)
- no built-in way to change data while dragging (e.g an OnDrag function) -> You have to resort to passing by reference
Rotating items
After we have implemented the Drag & Drop features, we want to also be able to rotate the item we are dragging. First we will create another 2D boolean array RotatedOccupiedSpace that will represent the rotated occupancy matrix of the item. This way we can just keep track of how many 90° rotations have been made and apply it to the matrix and texture.
Rotating the Occupancy Matrix
1
2
3
4
5
6
7
8
9
10
11
private int _rotations = 0;
public int Rotations
{
    get => _rotations;
    set
    {
        _rotations = value;
        _rotations %= 4;
        RotateItemClockwise(_rotations);
    }
}  //Keeps track of how often the Item has been rotated.
As you can see, every time we change the value of Rotations from another class, the method RotateItemClockwise() gets called. This method is responsible for rotating our matrix in 90° steps. Therefore we can also limit the maximum rotation states to 4, because 90° * 4 = 360° which results in the same orientation as no rotation.
1
2
3
4
5
6
7
8
9
10
11
12
13
14
15
16
17
18
19
20
21
22
23
24
private void RotateItemClockwise(int rotations)
{
    var rotated = DeepCopyArray(_occupiedSpace); //helper function that copies every element of a 2D Array by value.

    for (int n = 0; n < rotations; n++)
    {
        var rows = rotated.Count;
        var cols = rotated[0].Count;
        var temp = new Array<Array<bool>>();

        for (int x = 0; x < cols; x++)
        {
            var newRow = new Array<bool>();
            for (int y = rows - 1; y >= 0; y--)
            {
                newRow.Add(rotated[y][x]);
            }
            temp.Add(newRow);
        }
        rotated = temp;
    }

    _rotatedOccupiedSpace = rotated;
}
We first make a deep copy of the original occupancy matrix. Then we rotate the matrix 90° for each rotations by transposing (swapping rows and columns) the matrix and then reversing each row. FInally we assign the rotated array to the _rotatedOccupiedSpace attribute that is used for checking if the items can be placed in a specific slot.
Rotating the Texture
For rotating the Texture we’re dragging, we have to use a relatively simple workaround because we can’t rotate the DragPreview directly. We create a new TextureRect that is identical to our DragPreview, but the key difference being that the TextureRect.Image is rotated. Then we just SetDragPreview() passing the new rotated TextureRect as the parameter.
The helper function we use for rotating the Image can look something like this:
1
2
3
4
5
6
7
8
9
10
public TextureRect RotateTextureRect(TextureRect textureRect, int rotations)
{
    Image itemImage = textureRect.Texture.GetImage();
    for (int i = 0; i < rotations; i++)
    {
        itemImage.Rotate90(ClockDirection.Clockwise); // Image.Rotate90(Image) is a built-in Godot function for rotating Images
    }
    textureRect.Texture = ImageTexture.CreateFromImage(itemImage);
    return texture;
}
Handling Drag Failure
There are multiple valid options to handle drag failure and ultimately it is a game design decision. One way is to throw the item out of the inventory when the drag is not successful. I decided to take a different approach and reset the item to its starting position, which seems deceptively easy at first. Removing the item from the inventory is handled by a seperate “trash” drop zone.
First of all, the item has to be reset to its original position. Because we do not know where the drag event started once it ended, we have to store the position seperately. In my implementation I stored a Vector2 ItemStartPosition that is being set when the item is placed into the slot.
If the Item was rotation while dragging, we want to reset it to its starting orientation. This is achieved by storing a second _rotationsBeforeDrag int right as the _GetDragData() method begins. This needs to happen because if you don’t reset it to its original orientation, it may overlap with an occupied space after rotating the item. This is the behaviour we want for the inventory and storage grid.
For the Hand/Equipped item, we actually allow the player to rotate the item freely because it makes no difference for the backend and it feels more intuitive to the player.
Finally, we also need a reference to the item resource being dragged, so that we have the Texture and data of the item. For this we simply store a temporary item in the Inventory Manager Singleton when the drag starts.
Now we just place the item back into the slots at the ItemStartPosition and we’re done.
Storage System (Chest, Stash)
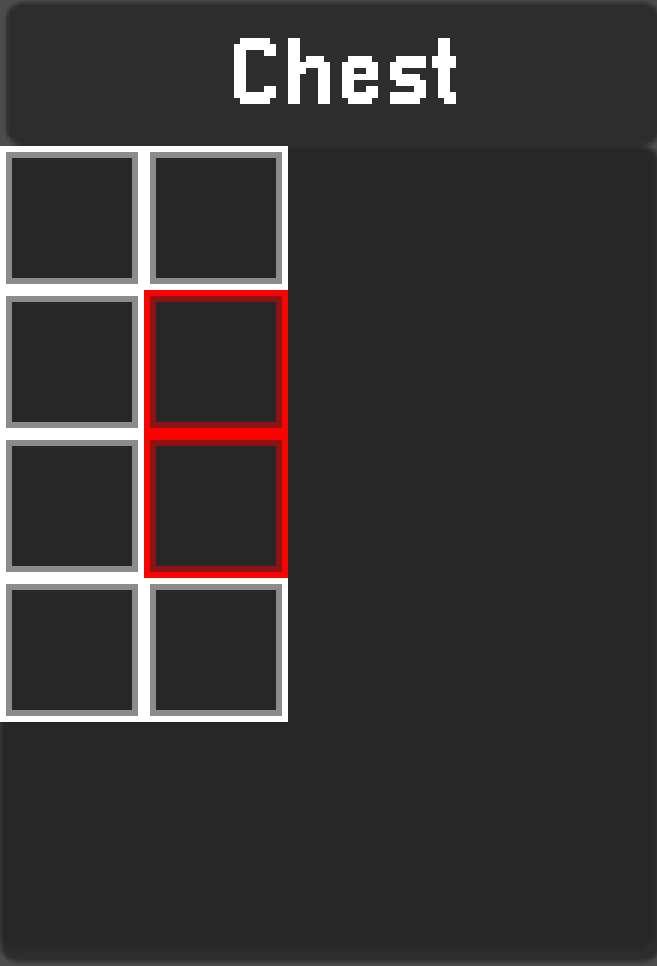
I have also added chests into our game that work on the same concept as our inventory. The main difference being, that we can predefine a layout for our chest and have some slots occupied without actually having an item set to it.
The grid will now be created by defining a 2D bool array, similar to the item occupancy matrix. Occupied slots have their _isOccupied bool set to true when instatiating the grid the first time. Here the occupied spaces are marked in red for illustration purposes.
The Drag & Drop system works seamlessly as the storage is just another drop zone. You just have to handle saving the items that are put into the storage.
In the world, the chest has an Area2D node as a child, to check if the player is near the chest and if he can interact with it to open the UI. The Storage UI also closes when the player gets too far away from the chest.
Final Thoughts
After some work we finally have a finished Inventory System. Now we can enjoy the satysfying feeling of managing our inventory neatly and stuffing in items we thought we have no space for after reorganising our inventory.
The built-in Drag & Drop system is best used for making a graphically simple systems like this one, but in case you want some fancy effects and animations for the drag preview or more customised handling of the data, it might be worth it to create a custom handler by tracking mouse position and click events. Next steps for this system would be saving and loading the inventory and item resources.
Thank you for your attention and I hope I could reduce the amount of frustrations when implementing a similar system yourself!