Problem Statement
Sometimes you find yourself in a position where you want to deploy something, but not (yet?) for the whole world to see. Think of an internal blog or a few tools that you built as a handy webapp for your coworkers to use. In such scenario you maybe also don’t want to use antiquated things like basic auth that requires your target audience (your coworkers in this case) to memorize even more passwords. What we really want is a single sign-on solution (SSO).
Solution
A simple solution for that problem is to make use of an OAuth2 provider. In our case, we all use Office365 in our company and therefore all have credentials for the Azure AD (Active Directory) server which also provides OAuth2 compatible endpoints for the authcode grant flow that we can use. Thanks to the open source community an off-the-shelf solution in form of OAuth2-Proxy is readily available and can be simply configured to fit our needs.
The Setup
This is what we have on our server where we want to deploy a new webapp that has limited access:
- Docker with docker compose plugin installed
- A Traefik reverse proxy that handles the routing of URL to webapp (running in a Docker container)
Implementation
Step 1: Set up the application on Azure
- Login as admin to your Office365 (via https://office.com)
- Navigate to Azure https://portal.azure.com/
- Click on “View” under “Manage Active Directory”
Register a new App
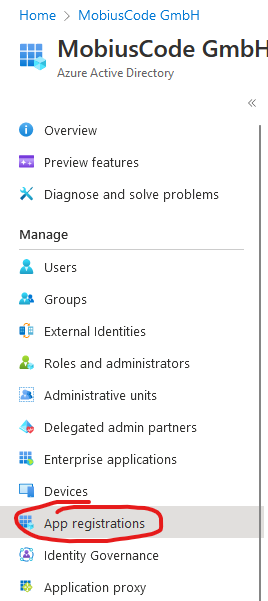
Simply click on App Registrations
then click on New Registration and add a new app

Specify a name, in our case we want to provide a Toolbox for our coworkers, but you are free to essentially name it anything you like
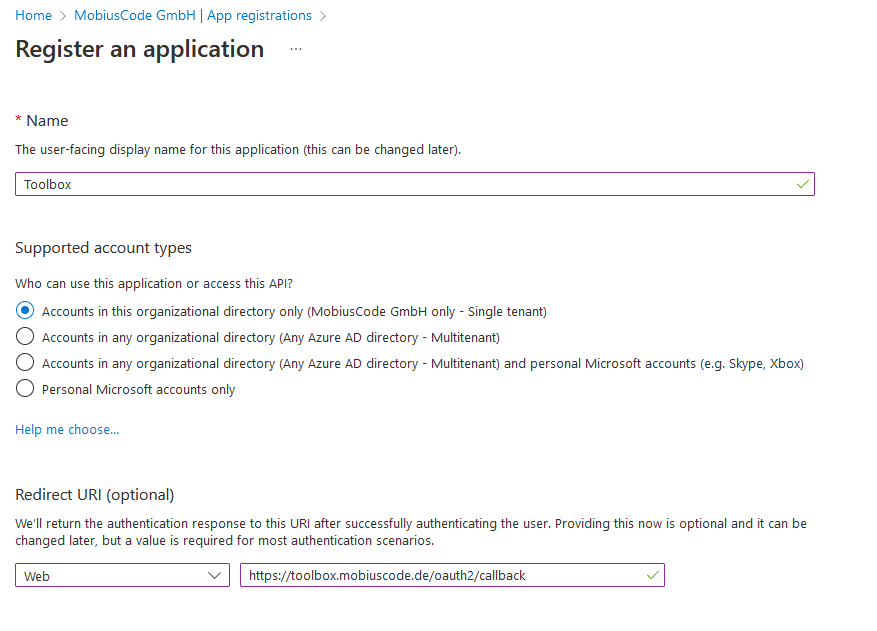
Make sure to select Accounts in this organizational directory only, as we don’t want people from other companies to be able to use our toolbox. Also add the Redirect URI, in our case the page is located at https://toolbox.mobiuscode.de, so we provide the URI https://toolbox.mobiuscode.de/oauth2/callback here. This is the standard path used by our OAuth2 reverse proxy, so if your URI is something like https://mygreatsite.com then the callback URI would be https://mygreatsite.com/oauth2/callback.
Add a client secret
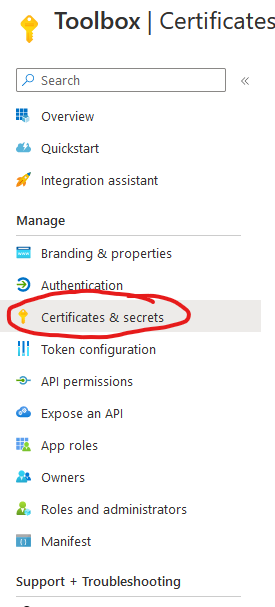
For our reverse proxy to be able to authenticate itself against the Azure AD OAuth2 provider, it needs to have a valid client secret. To obtain that we have to create a new one by clicking on Certificates & secrets.
Here we click on New client secret and specify when the secret is supposed to expire. After we are done a new row appears like this one:

Make sure to copy the Value (which is in fact your client secret) as you can only copy the value now.
Add API permissions
Next we need to allow our OAuth2 client to get read access. This is done by clicking on API permissions
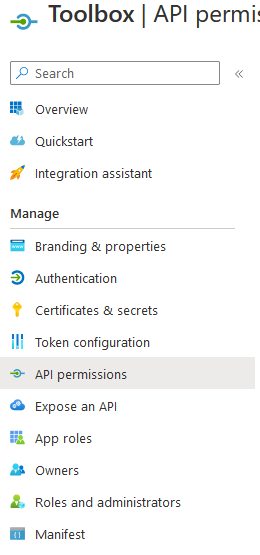
and adding the Group.Read.All permission. First click on Add a permission and then add a Microsoft Graph type permission. Now search for group and select Group.Read.All.
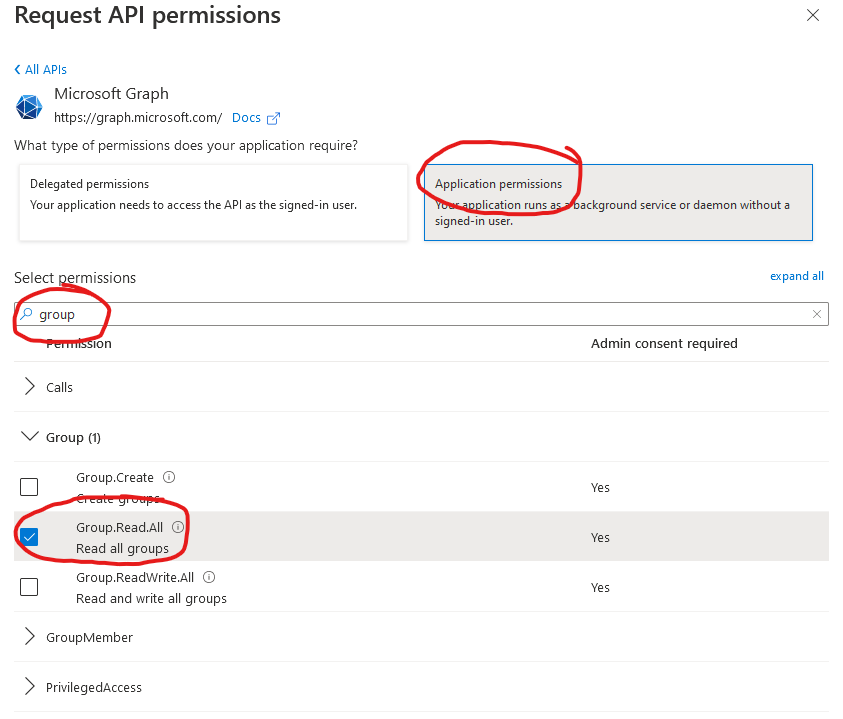
To add the selected permission click on Add permission. Finally don’t forget to also grant admin consent for your employees by clicking on Grant admin consent for {your organization}, so that they are able to log in and use your webapp.

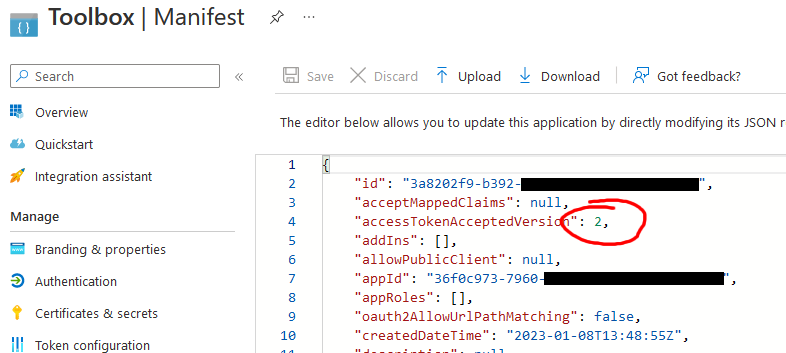
Update manifest
As a final step we need to adjust the application manifest slightly and set accessTokenAcceptedVersion from null to 2
Step 2: Create a docker compose file
Finally we create a docker compose file that specifies the following containers:
- the OAuth2-Proxy that calls the Azure AD OAuth2 endpoint to log you in & check your identity
- the backend application that you want to run (as an example here we’re using Homer which is a simple webpage with links to other services)
This is an example docker-compose.yml file that assumes that you have a Traefik running (updated since Bitnami is no longer providing free images):
1
2
3
4
5
6
7
8
9
10
11
12
13
14
15
16
17
18
19
20
21
22
23
24
25
26
27
28
29
30
31
32
33
34
35
36
37
38
39
40
41
42
43
44
services:

  oauth2:
    image: quay.io/oauth2-proxy/oauth2-proxy:latest
    networks:
      - internal
      - web
    environment:
      - OAUTH2_PROXY_COOKIE_SECRET=<your-cookie-secret>
      - OAUTH2_PROXY_HTTP_ADDRESS=0.0.0.0:4180
      - OAUTH2_PROXY_UPSTREAMS=http://homer:8080
      - OAUTH2_PROXY_COOKIE_NAME=_oauth2_proxy
      - OAUTH2_PROXY_COOKIE_EXPIRE=48h
      - OAUTH2_PROXY_COOKIE_REFRESH=24h
      - OAUTH2_PROXY_COOKIE_SECURE=true
      - OAUTH2_PROXY_COOKIE_HTTPONLY=true
      - OAUTH2_PROXY_REVERSE_PROXY=true
      - OAUTH2_PROXY_PROVIDER=azure
      - OAUTH2_PROXY_AZURE_TENANT=<your-azure-tenant-id>
      - OAUTH2_PROXY_CLIENT_ID=<your-azure-client-id>
      - OAUTH2_PROXY_CLIENT_SECRET=<your-azure-client-secret>
      - OAUTH2_PROXY_OIDC_ISSUER_URL=https://login.microsoftonline.com/<your-azure-tenant-id>/v2.0
      - OAUTH2_PROXY_EMAIL_DOMAINS=mobiuscode.de
    labels: # traefik configuration via labels
      - traefik.enable=true
      - traefik.http.routers.homer.rule=Host(`your.domain.com`)
      - traefik.http.routers.homer.tls.certResolver=default
      - traefik.http.routers.homer.tls=true
      - traefik.http.services.homer.loadbalancer.server.port=4180
    restart: unless-stopped

  homer:
    image: b4bz/homer:latest
    volumes:
      - ./assets/:/www/assets
    networks:
      - internal
    restart: unless-stopped

networks:
  internal:
  web: # this is the network that we share with Traefik
    name: traefik_web # <- depends on your Traefik set-up
    external: true
Placeholders are marked in <...> and should be filled using these values:
| Variable | Description |
|---|---|
your-cookie-secret |
A random value that can be generated using one of the methods described here |
your-azure-client-secret |
The value that we got when we created a client secret in step #1: 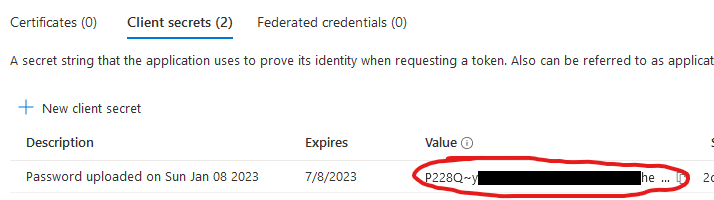 |
your-azure-tenant-id |
This can be obtained from the application overview: 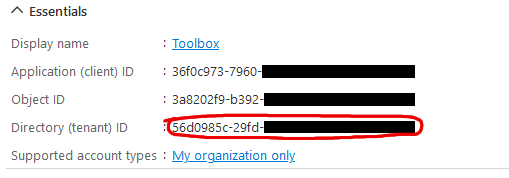 |
your-azure-client-id |
This can also be obtained from the application overview: 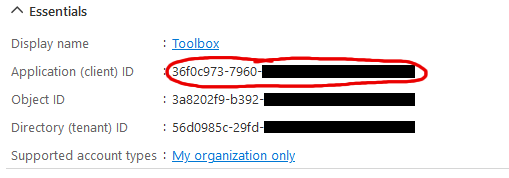 |
As for the Traefik labels, check the official Traefik documentation
Once everything is configured properly you should be able to start the two containers by issuing docker compose up. After everything started up you should see a login page like this here and you should be able to login with your office credentials:
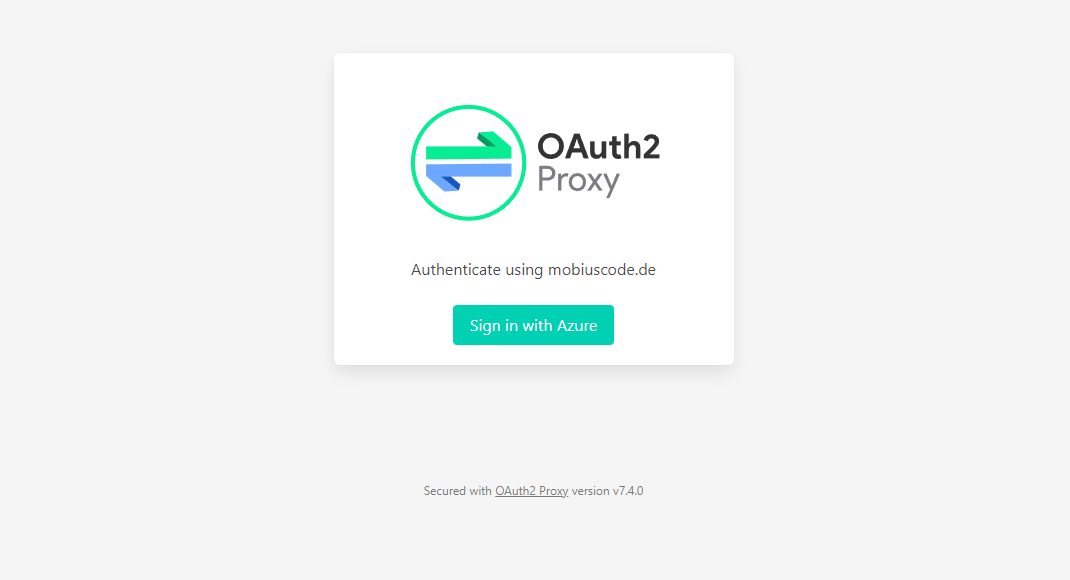
🎉 Congratulations you have now a SSO solution for your company’s internal service!